Deposit data
The process of getting data into the data repository and publishing it is called depositing. This can be done using the online deposit workflow that is part of the Data Repository service. Only registered users can deposit data and create publications. Once the deposit is complete, you will have a publication for your dataset.
Warning
Use the training instance to create test uploads, the production instance is for publications only.
Prepare files
To prepare the data files for a deposit there are some best practices for the file format, file size, metadata, data documentation and structuring. For more information, visit the best practices page.
Deposit via the browser
To deposit a new data set login to the service and use the Deposit now or Upload button to start the process. This process consists of the following steps:
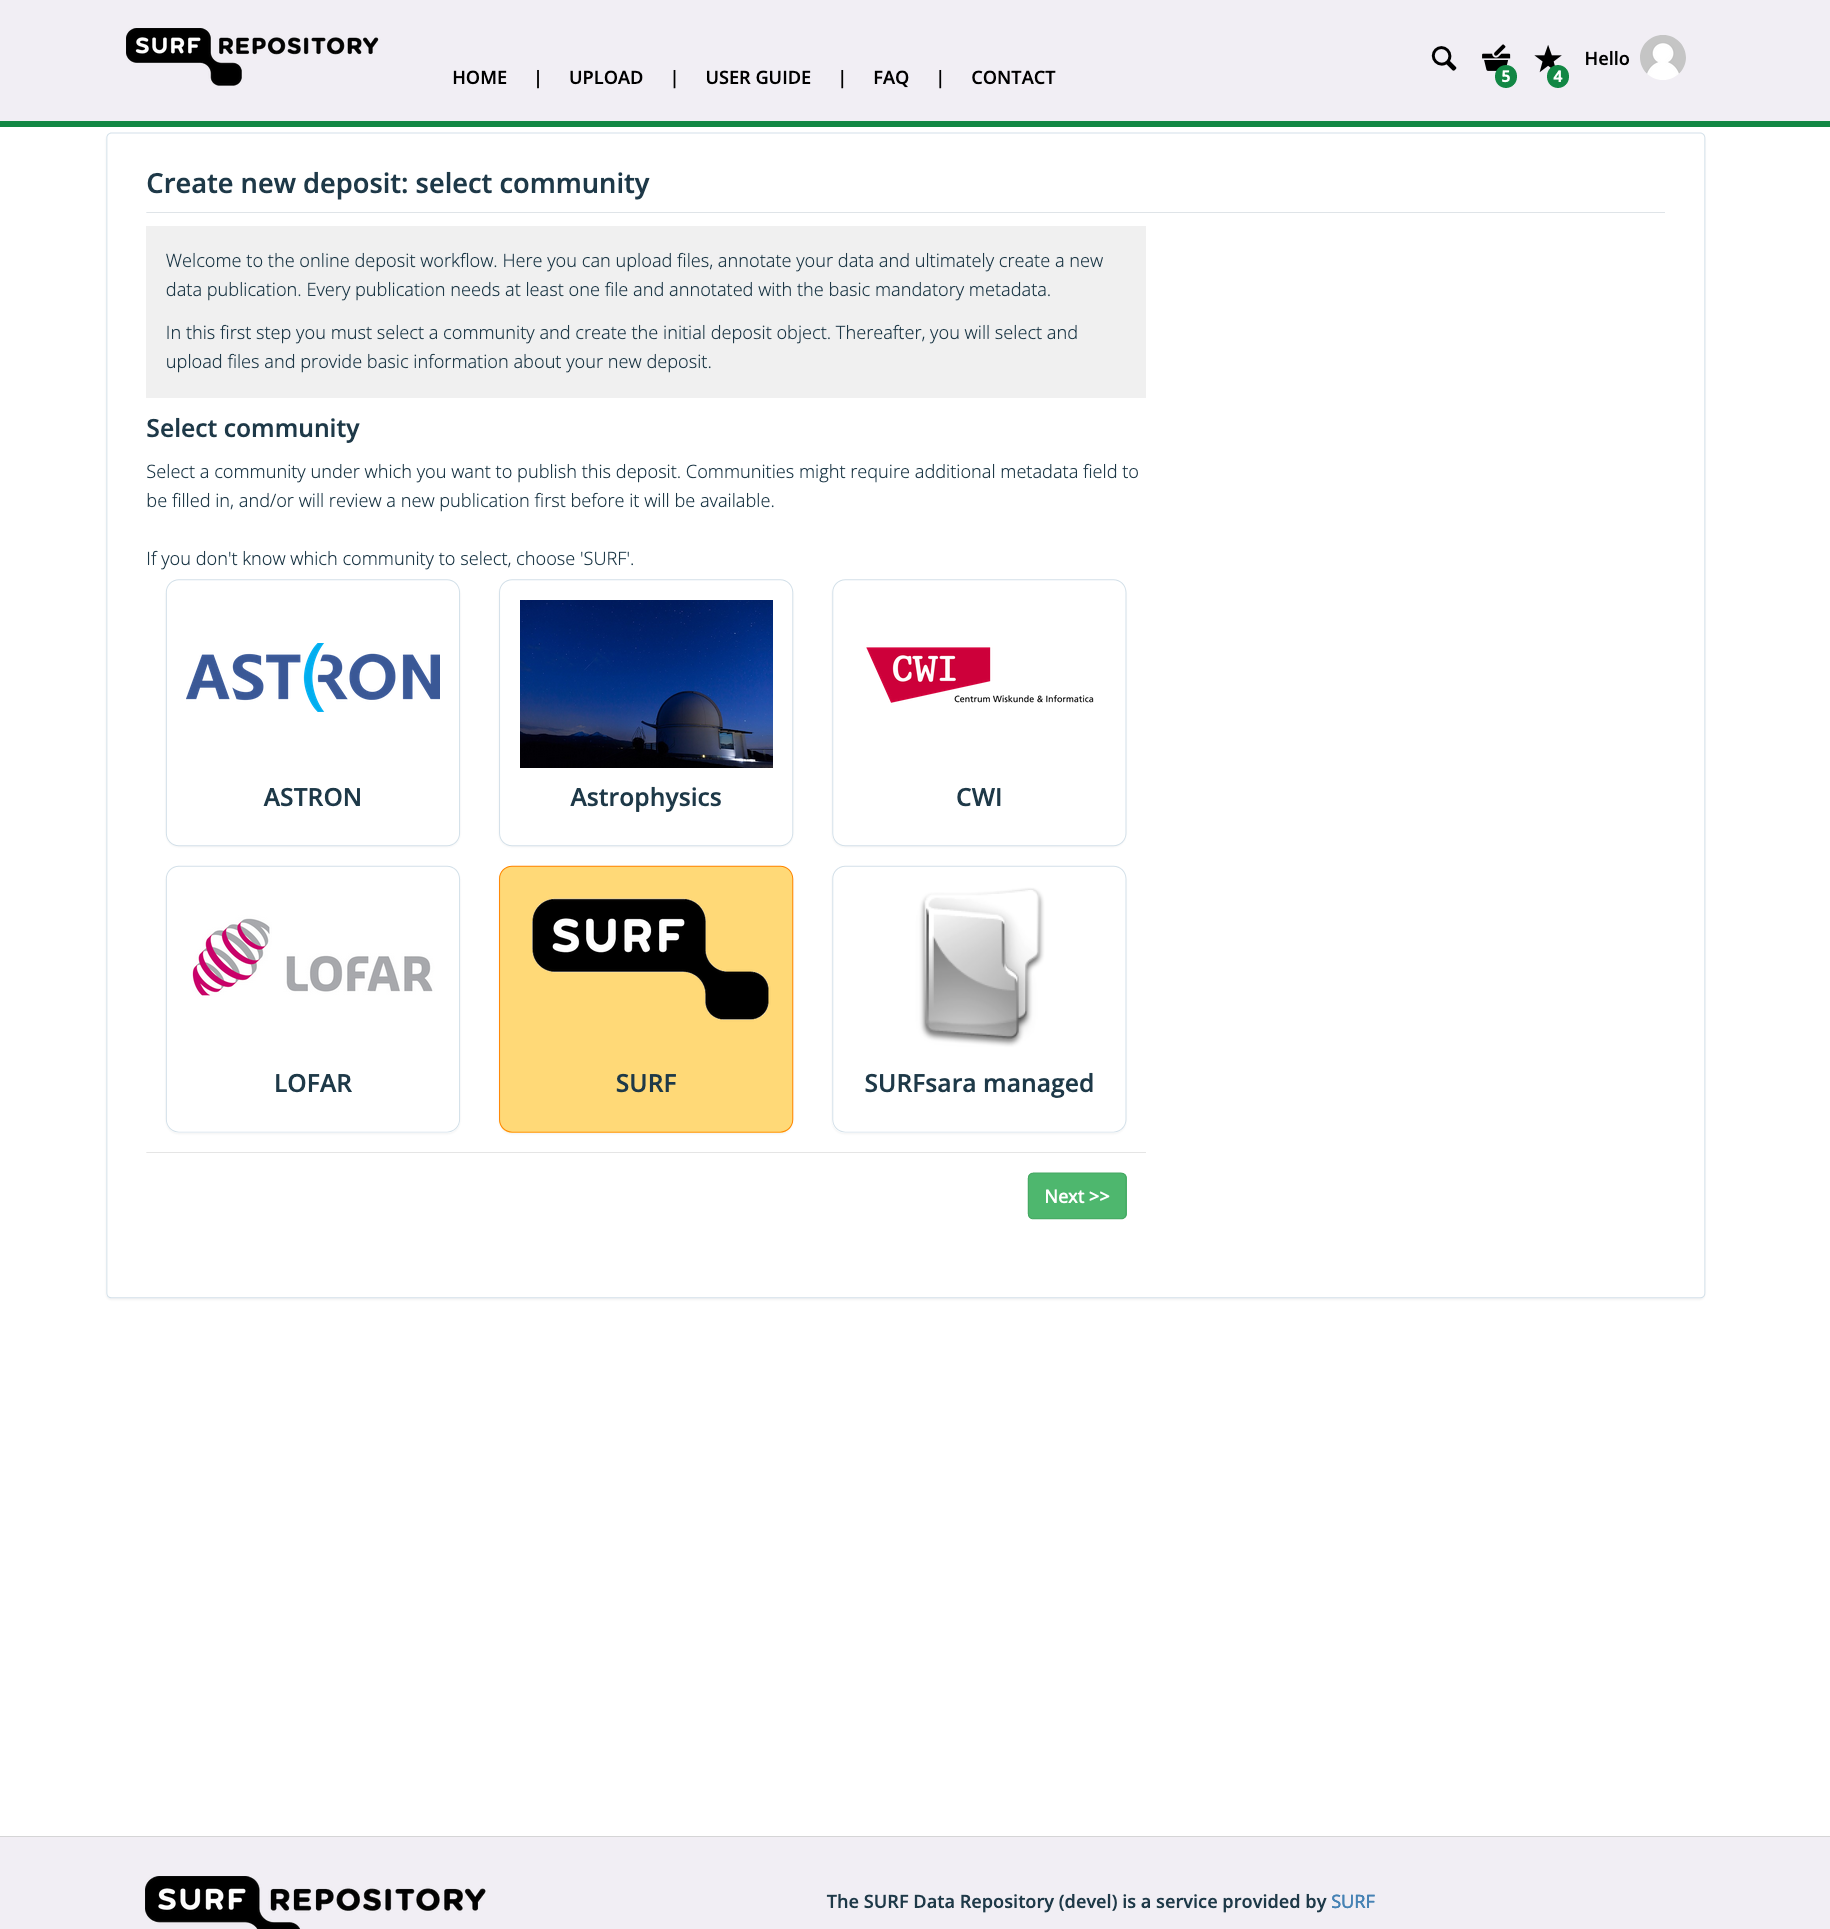
On the ‘Create new deposit’ page, select a community to deposit under and click ‘Next’. The community influences your abilities and might trigger specific workflows. Also, additional metadata fields might have to be annotated.
On the ‘Create new deposit’ page, use the
Add filesbutton to select the files to deposit and clickStart uploadto upload the file(s).Note
Make sure that all files are uploaded in an acceptable file format. Valid file formats can be found on the file formats documentation page. If the data format you are trying to upload is not supported, please contact the helpdesk.
Provide the basic metadata for your deposit such as the title, creator(s), keywords (for searching purposes) and description. The fields marked with a * are mandatory metadata fields.
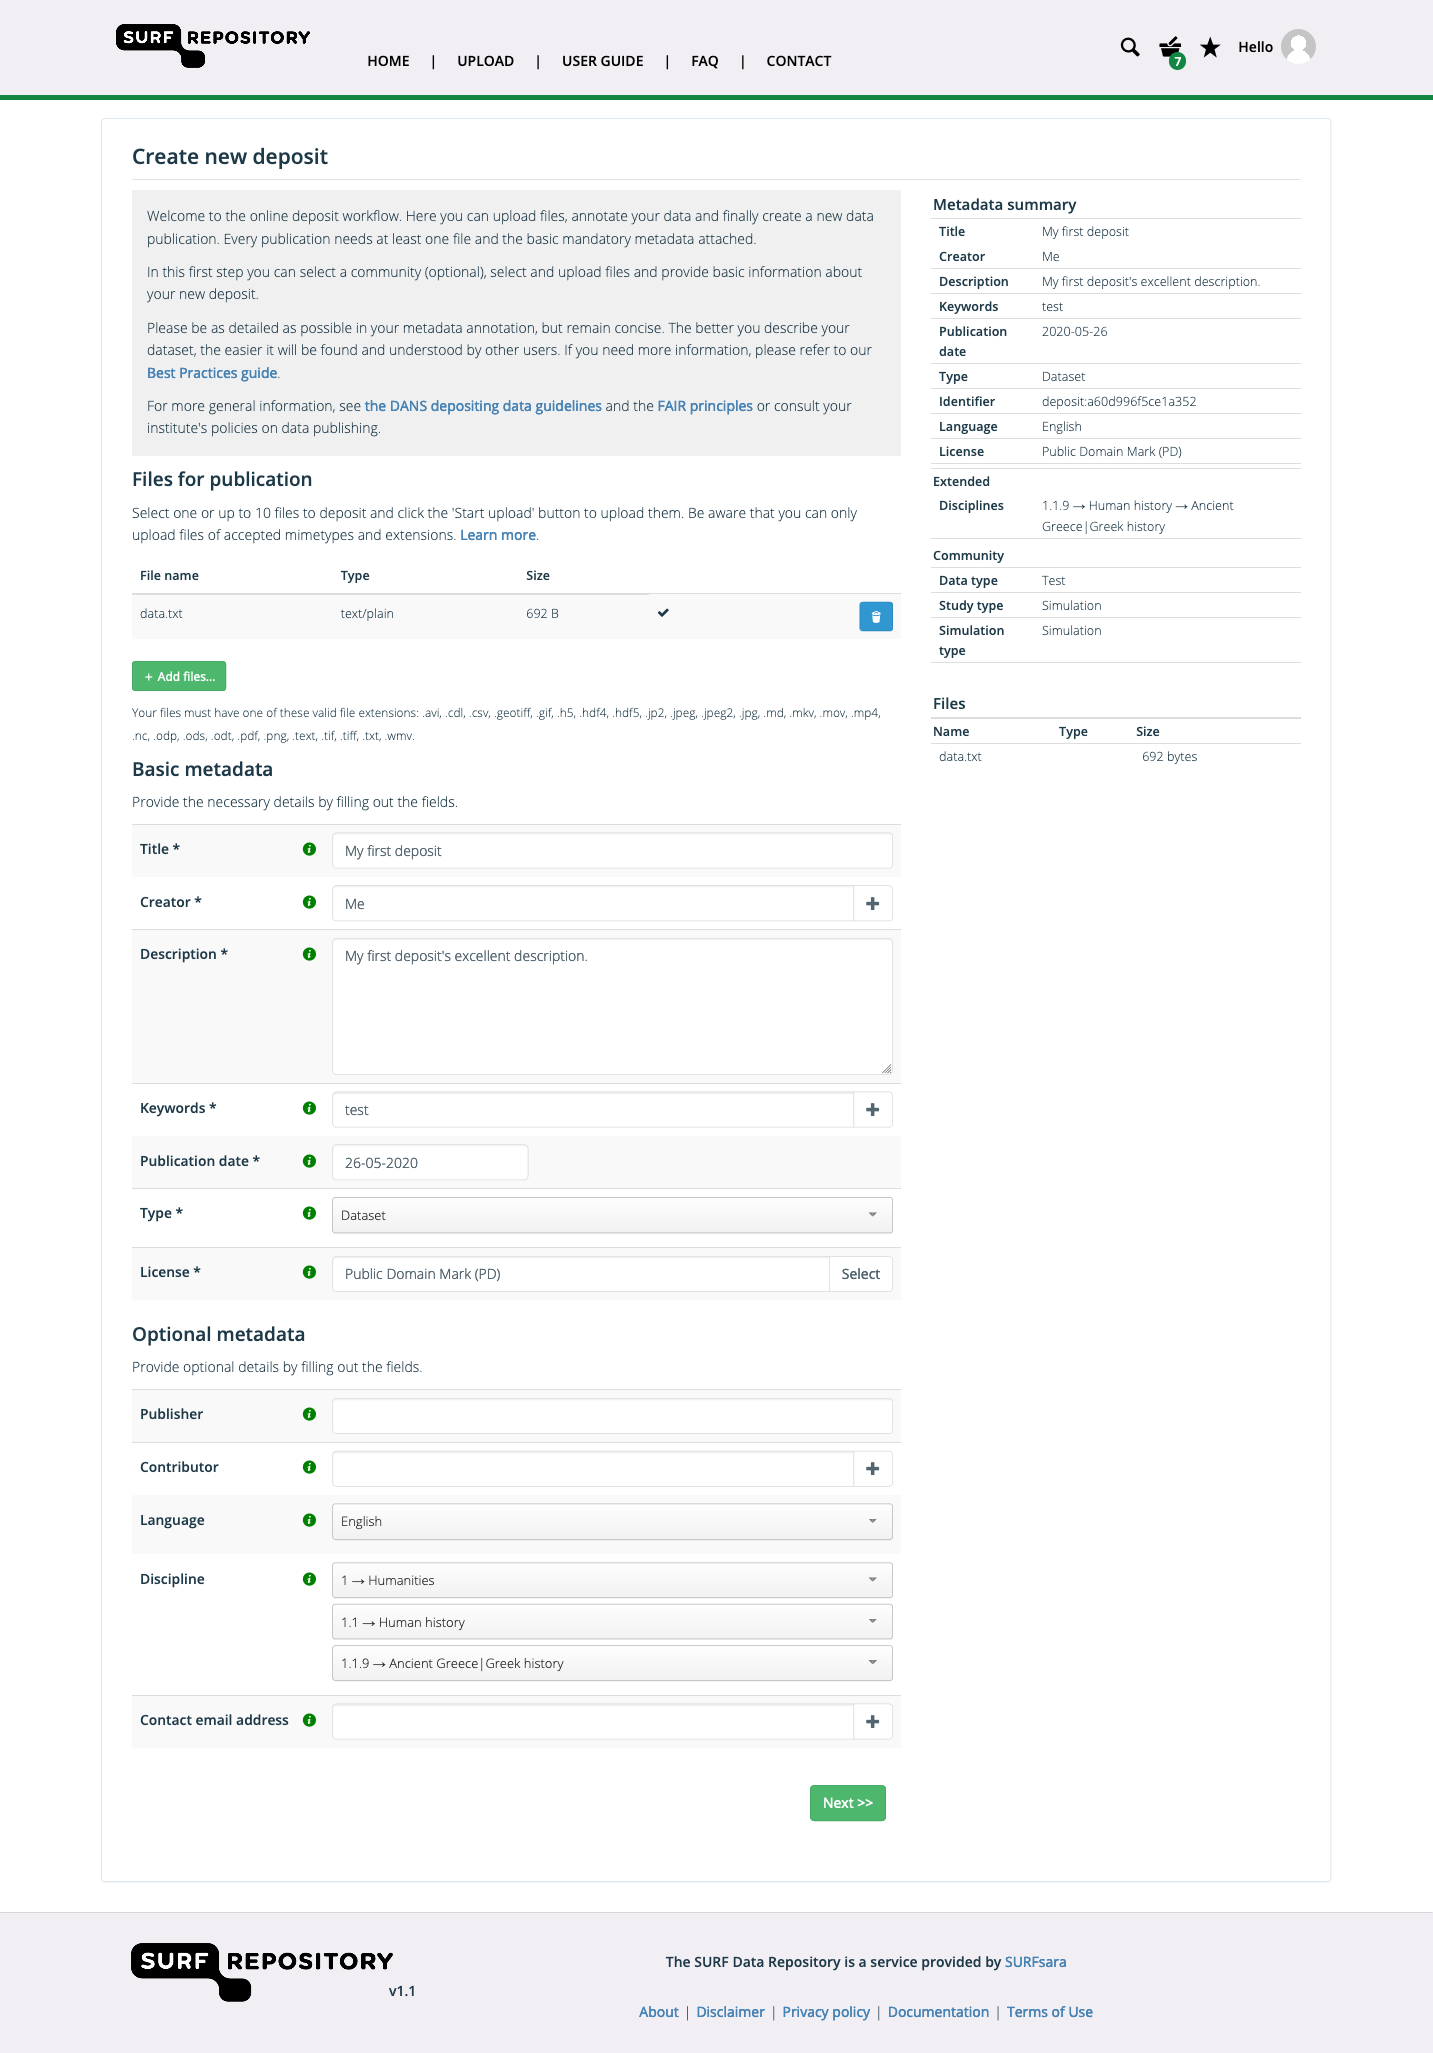
To set the appropriate license for the publication use the
Selectbutton to choose one of the available licenses. If you are not sure which license to choose, answer the questions on the top of the built-in wizard form to find the appropriate license.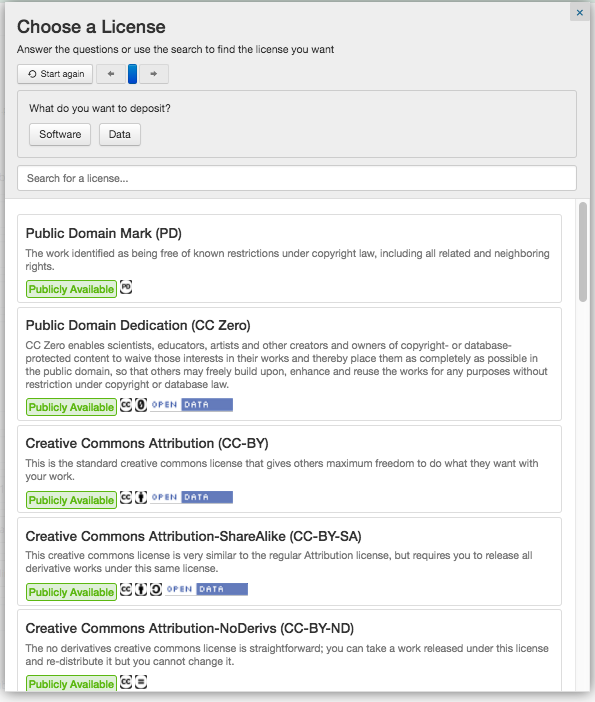
Once all meta-data is complete, click
Next >>to go to the second step of the online deposit workflow.To make the deposit discoverable you must select a community, and optionally a collection and/or a metadata schema (if possible). If you are a member of a community and you want to deposit data in that community, select the community name. The available collections will be pre-populated based on which community you choose and which collections you have created yourself.
If a community or collection is associated with a metadata schema, you will be presented with a community or collection metadata form. The fields marked with a * are mandatory metadata fields.
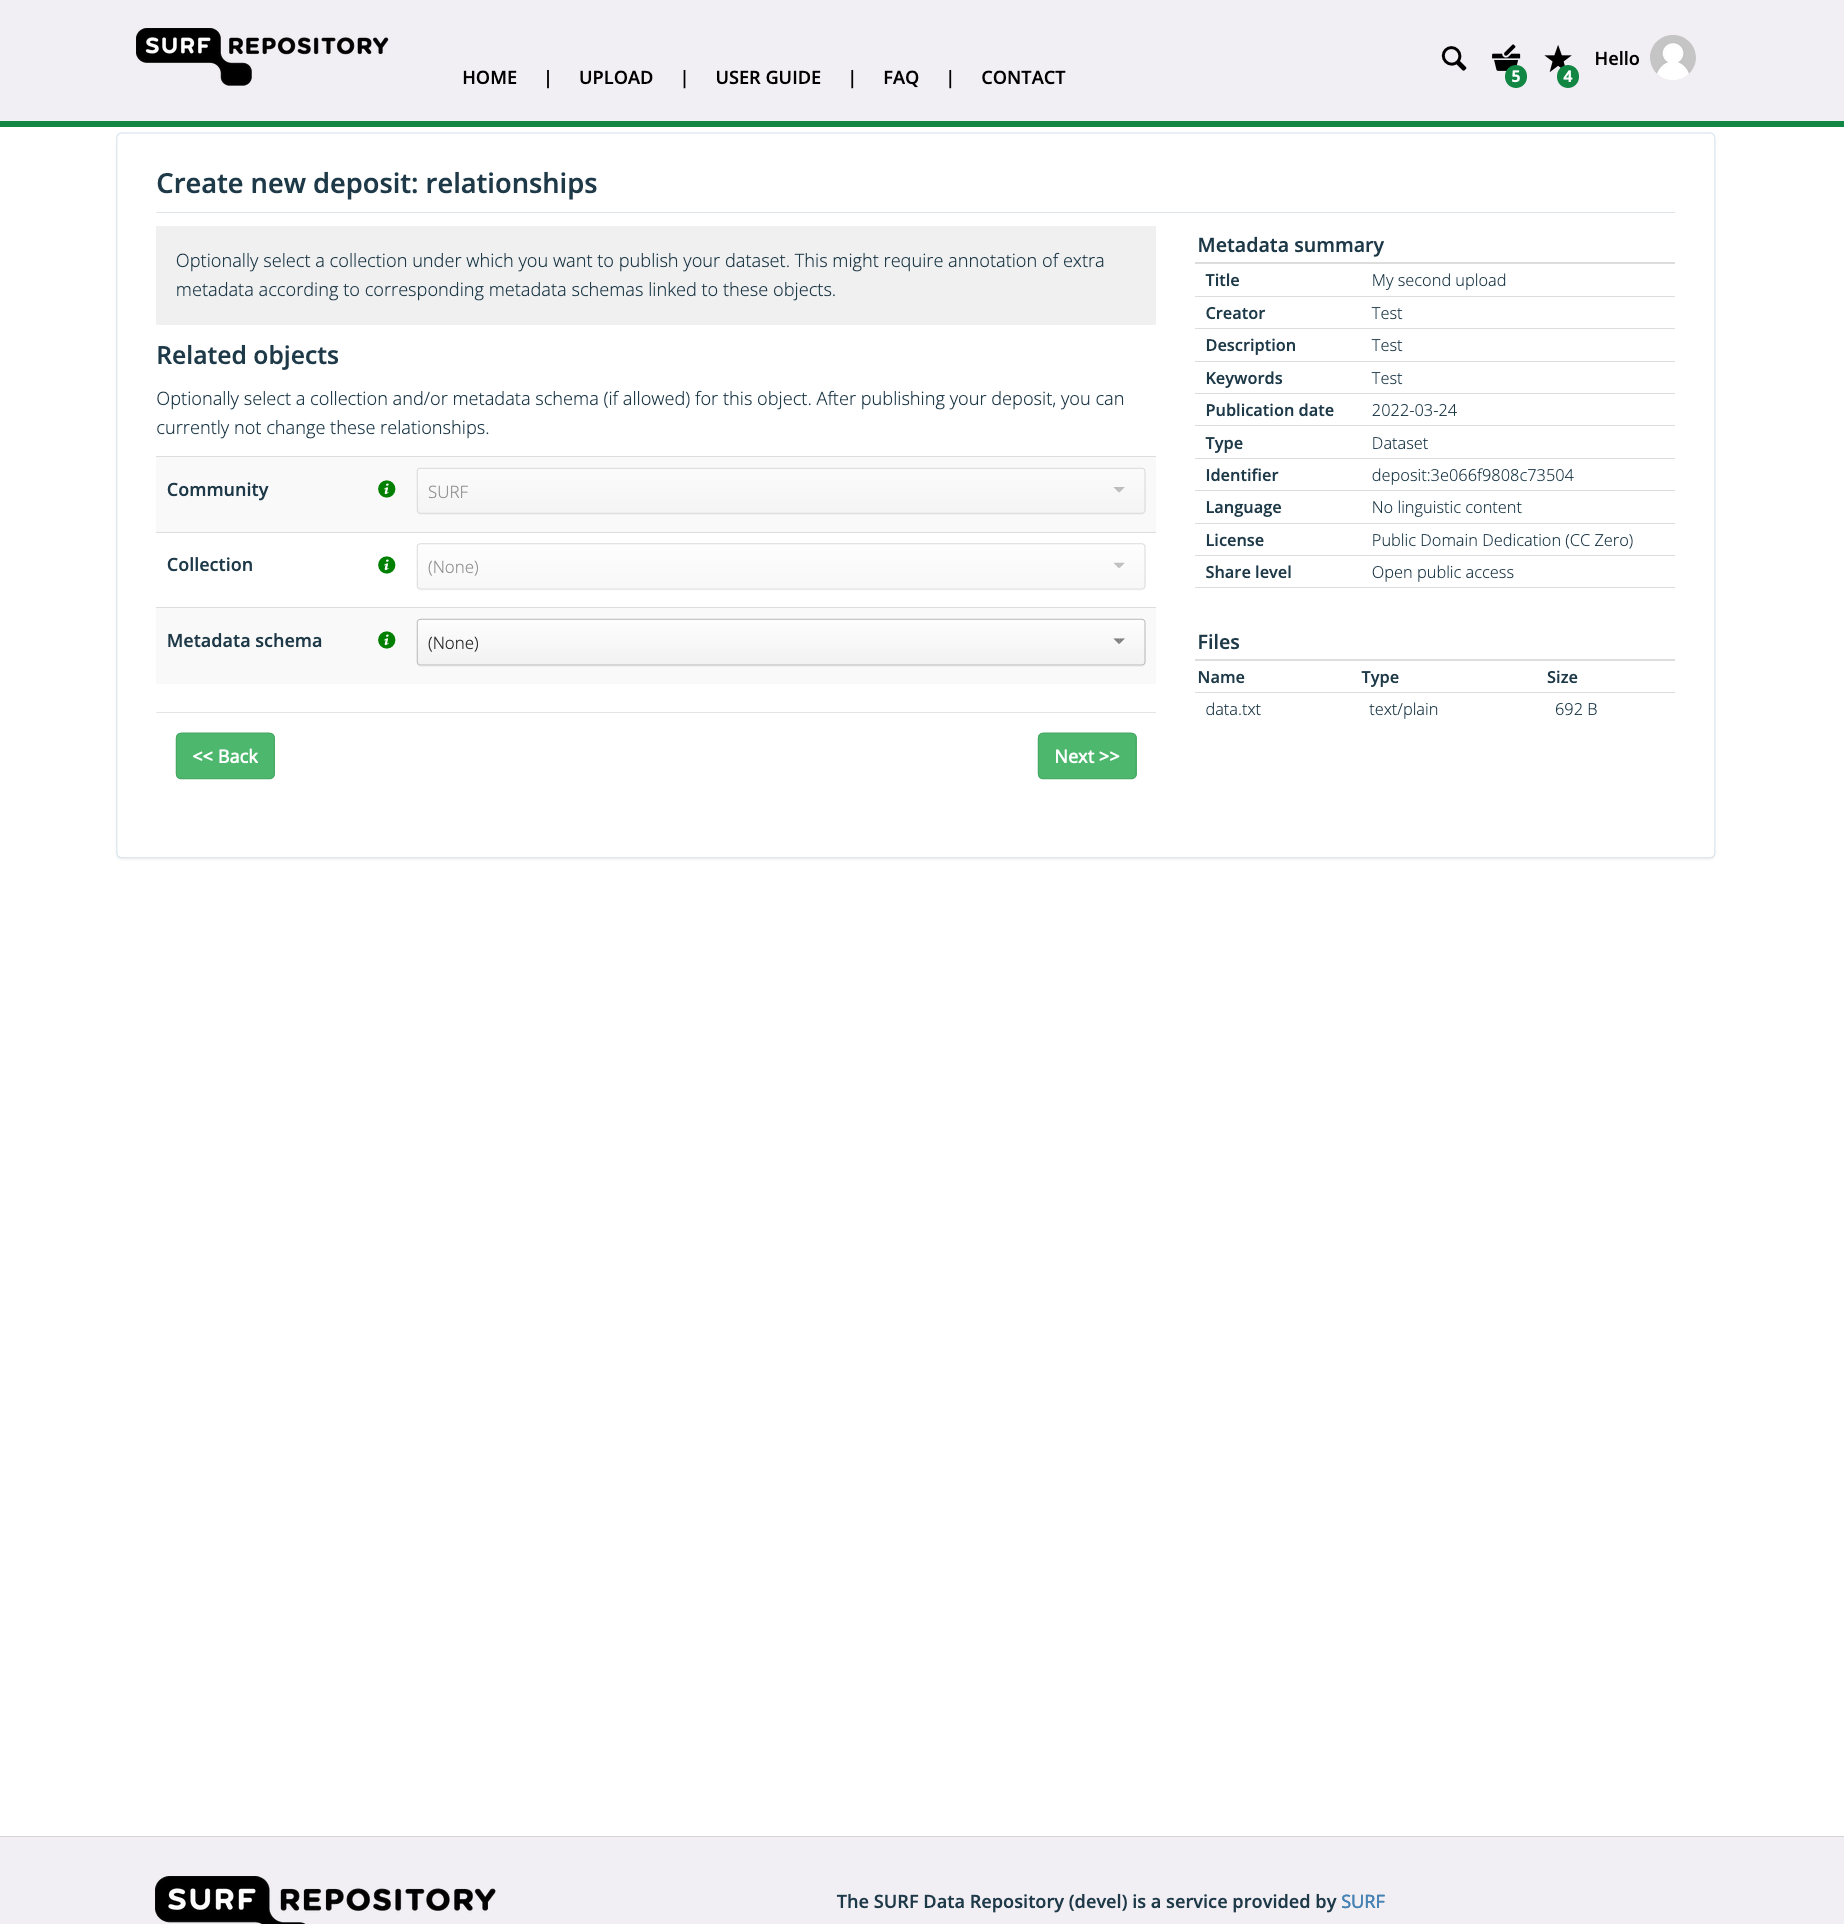
Once all metadata is complete, click
Next >>to go to the third and final step of the online deposit workflow.In the final step you can fill in optional information such as the embargo data of your data (if configured). You can also specify links that are related to this publication. If you have any additional metadata that does not fit the basic or community metadata fields, you can add them here. For every field there needs to be a unique field name and a value. Finally, carefully read the Terms of use and Data Producer Agreement before checking the checkbox.
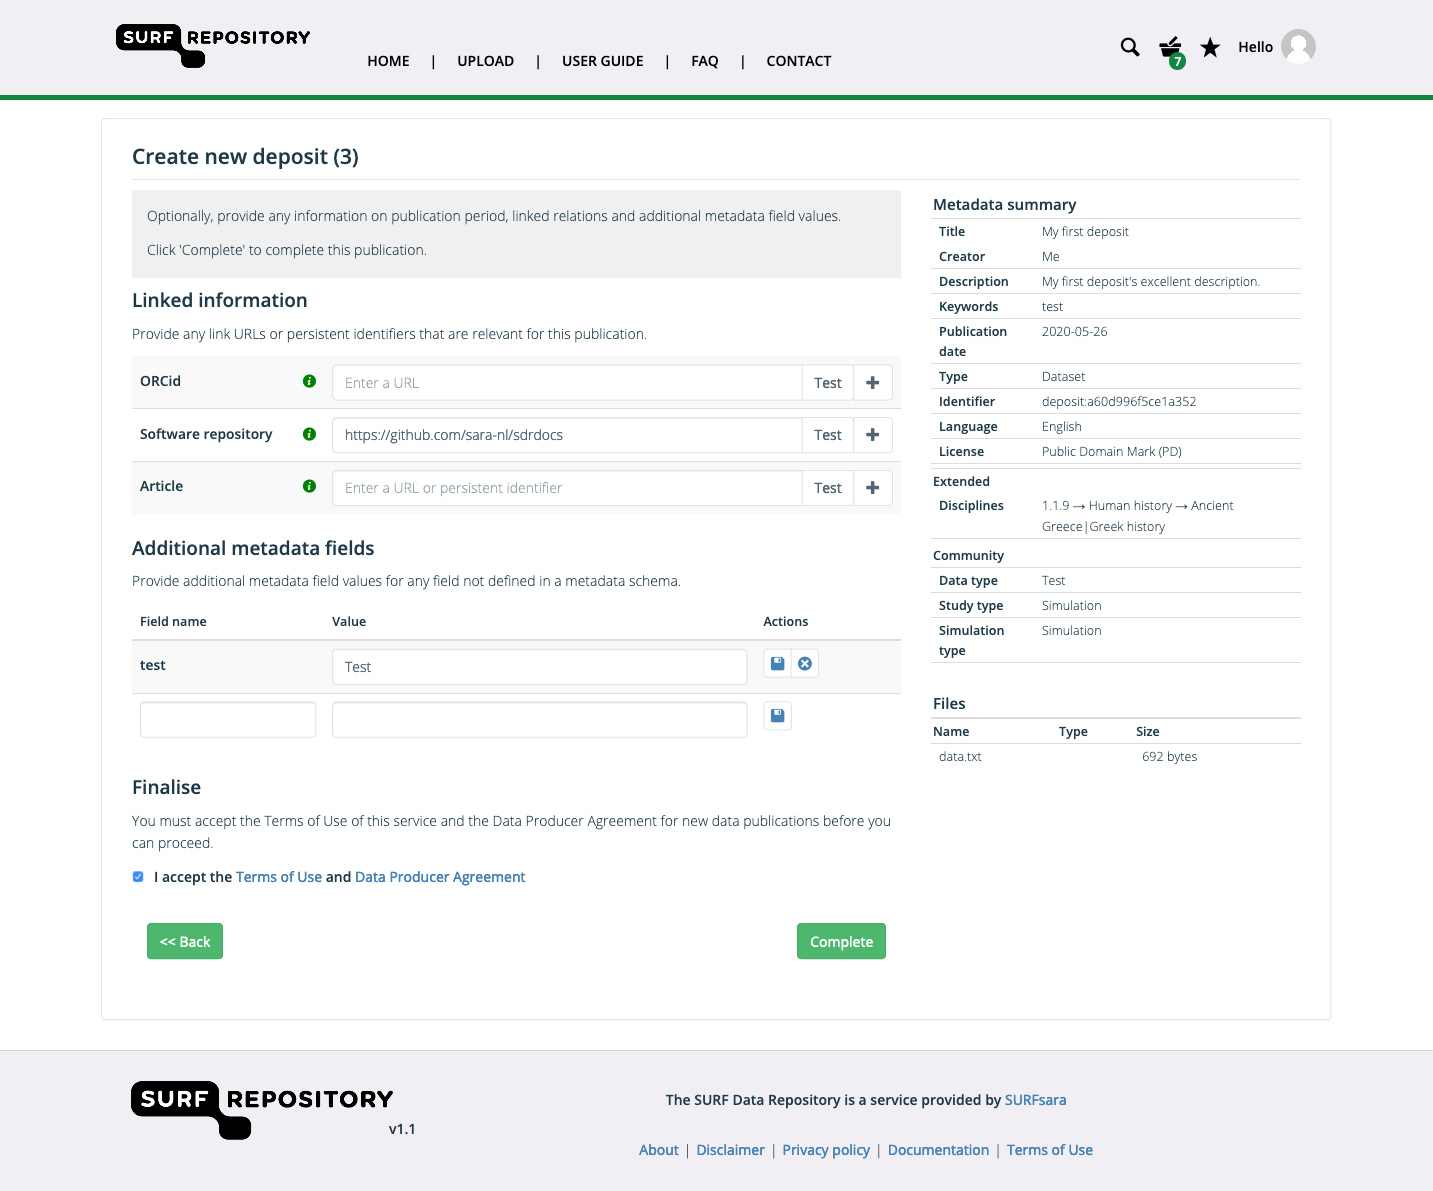
When you have checked all metadata in the right sidebar, click on the
Completebutton to finalize your deposit.
Deposit via the REST API
If you have many deposits to create, or have an automated workflow set up or application that generates data that needs to be published, you can make use of the REST API provided by the service. Please refer to the REST API page for more information.