Advanced usage for administrators
This page provides information on advanced usage of the SURF Data Repository, such as metadata schema definition, and community creation and memberships. For these objects, you need advanced permissions in the service.
Creating metadata schemas
For a complete description of metadata schema objects, see Metadata schemas.
The first question to ask before making a metadata schema is: Is it necessary to create a new metadata schema? or are there already existing metadata schemas which can be adapted for use? We advice to reuse existing schemas. You can find here the best practices for defining your metadata schema.
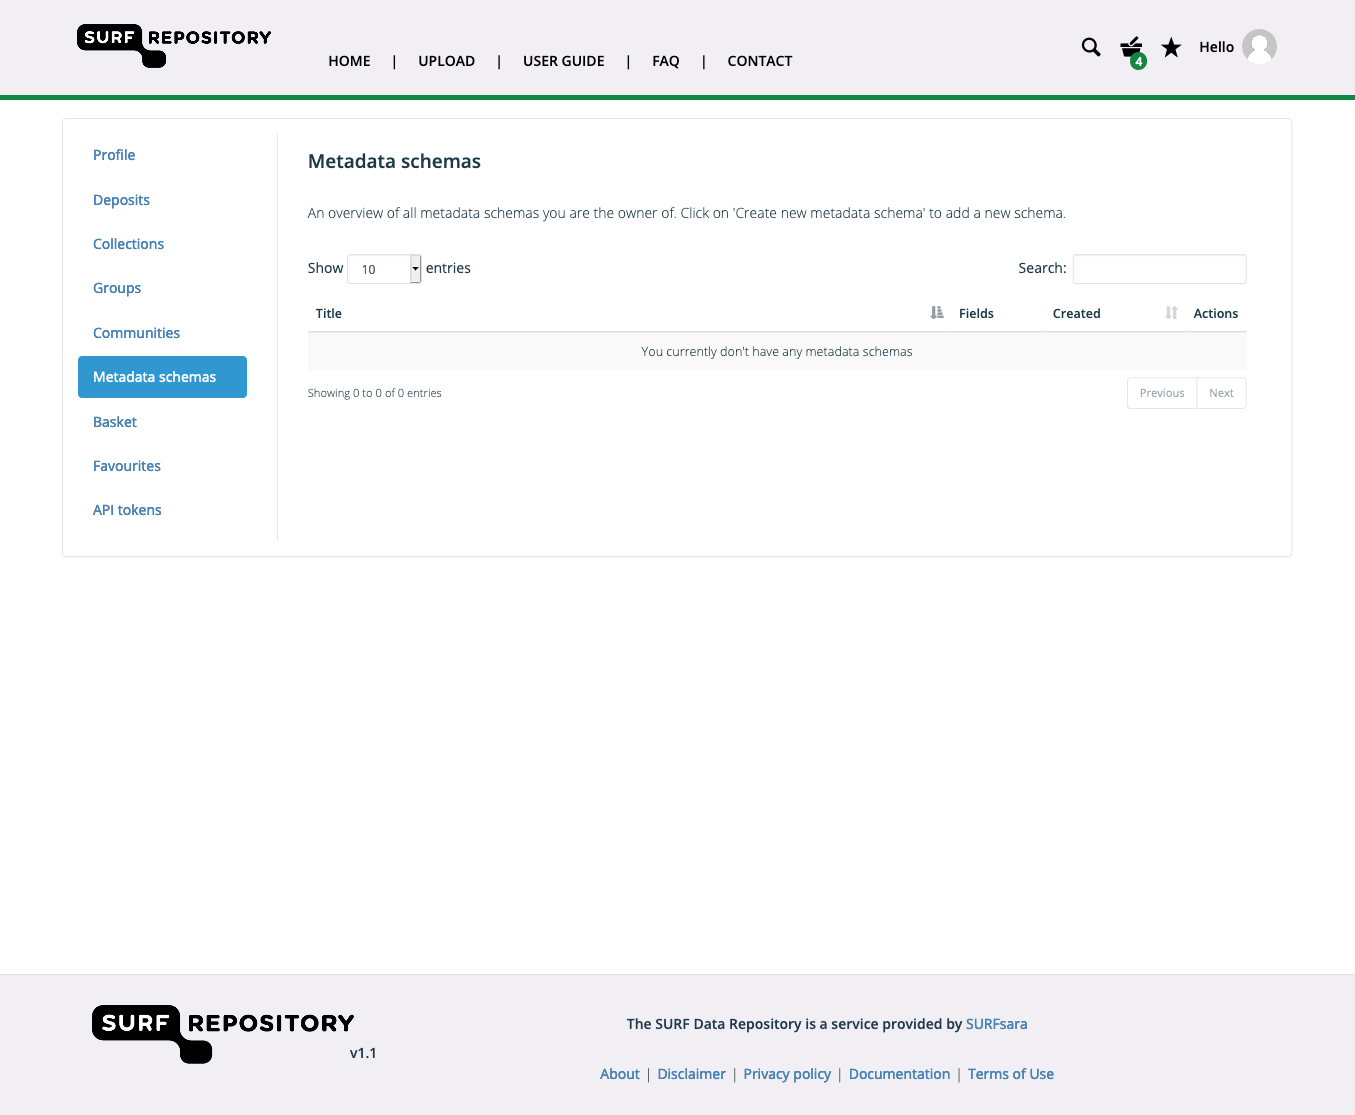
To define a metadata schema for your data, go to the account overview page and click on the Metadata schemas tab on the left. Hit the Create new metadata schema button to go to the metadata schema creation form.
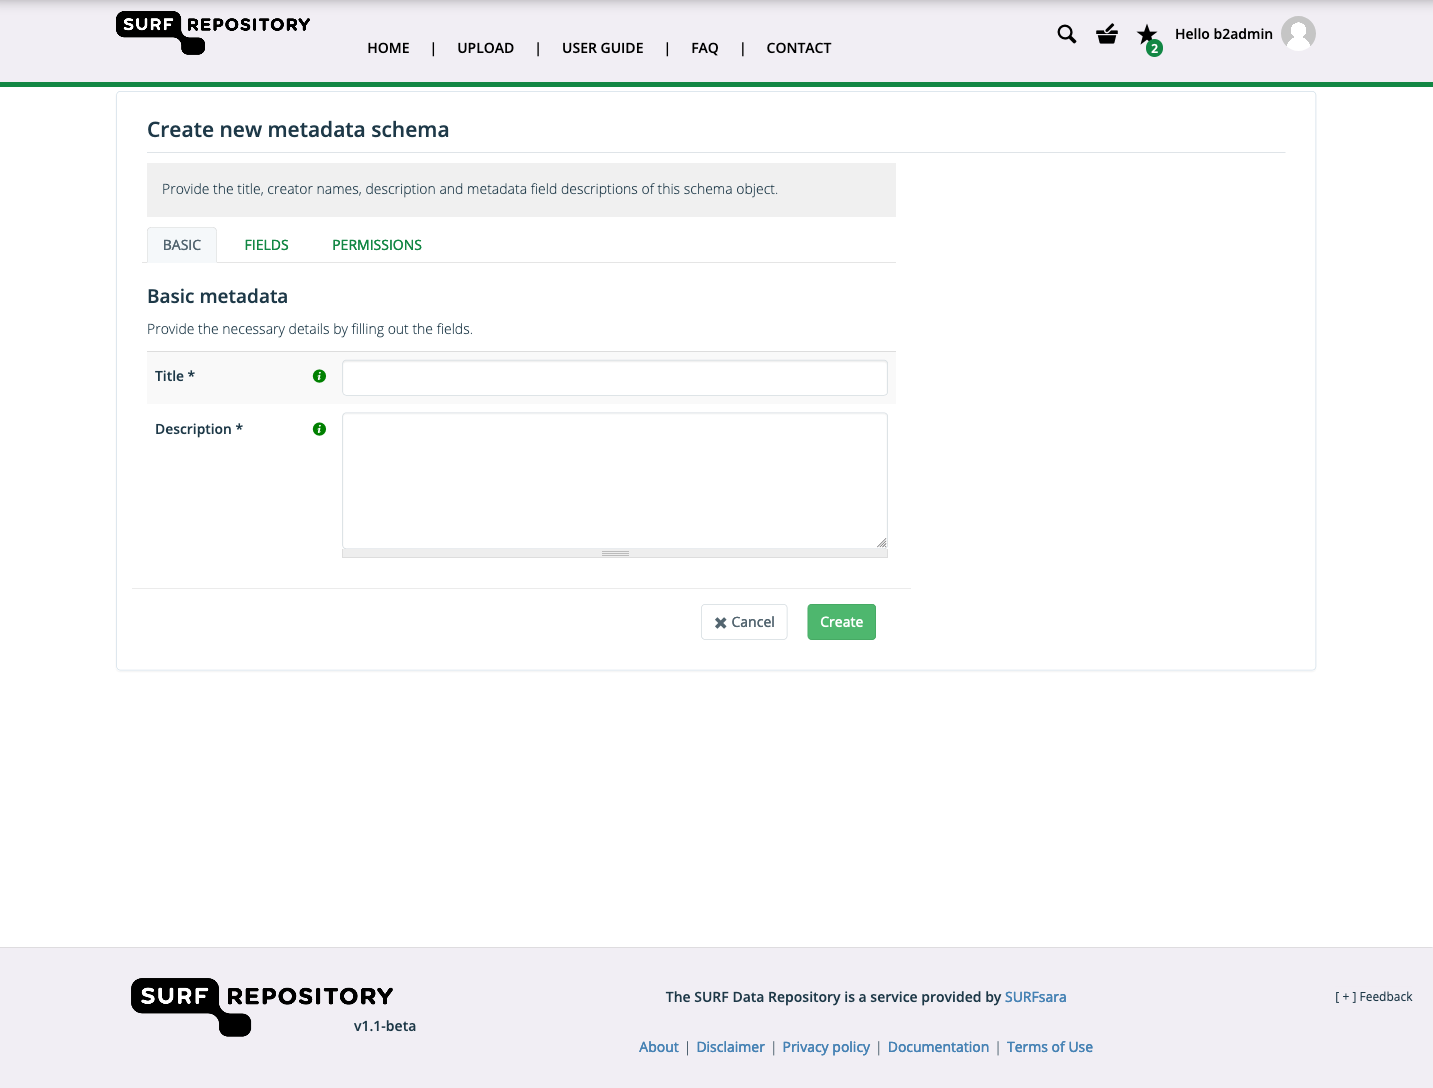
You need to provide a title, creator, and description for the metadata schema:
Then add metadata fields to the schema on the tab ‘Fields’. A metadata field contains information about the field such as description, default value, type and if the field is optional or not.
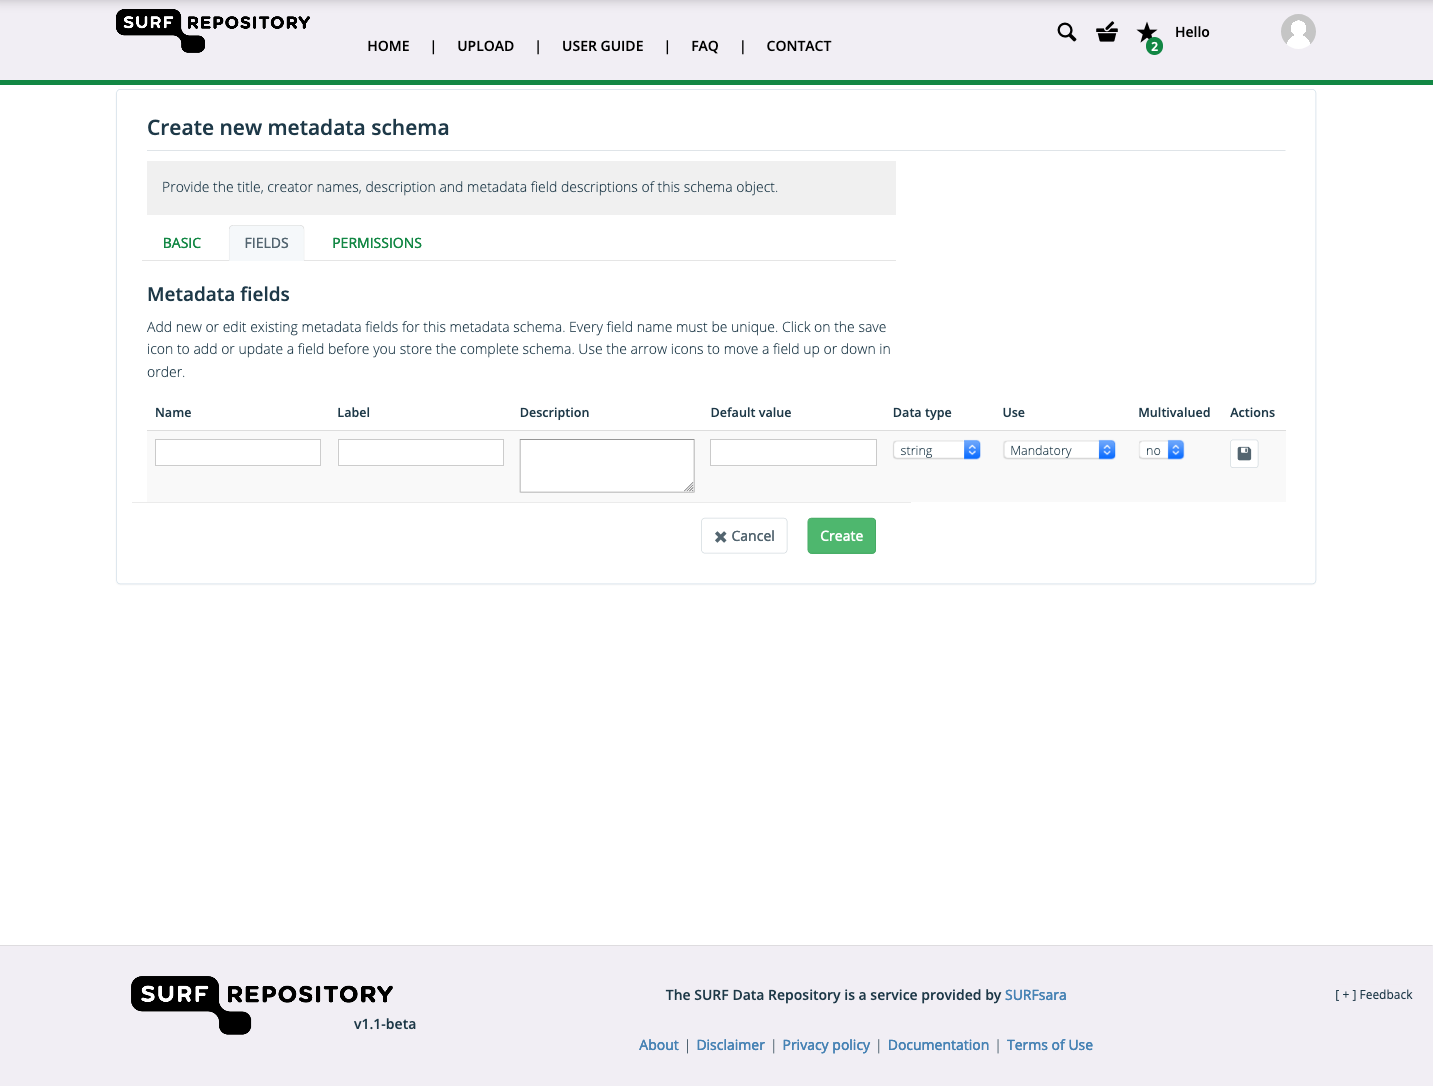
To save the field click on the Save icon under Actions. You can move a field up or down in position by using the arrow buttons after each field.
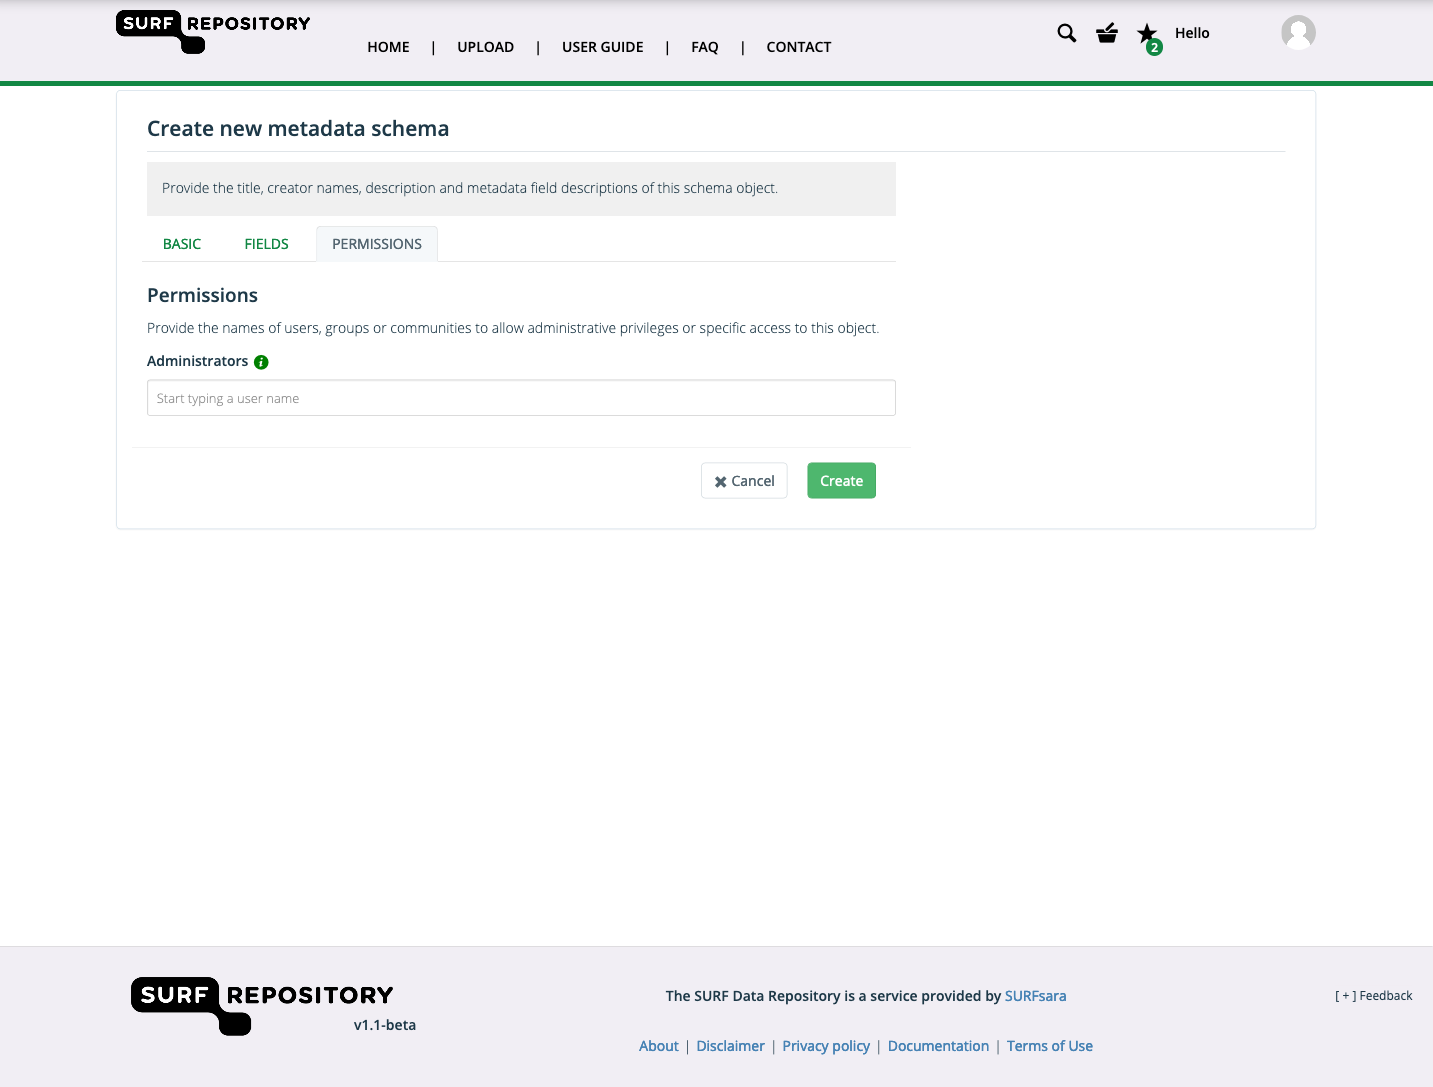
On the ‘Permissions’ tab you can add administrators who can also manage the schema.
Once satisfied hit the Create button to finalise the creation of the metadata schema. Please note that all schemas are public and can be used by any user.
Creating communities
For a complete description of community objects, see Communities.
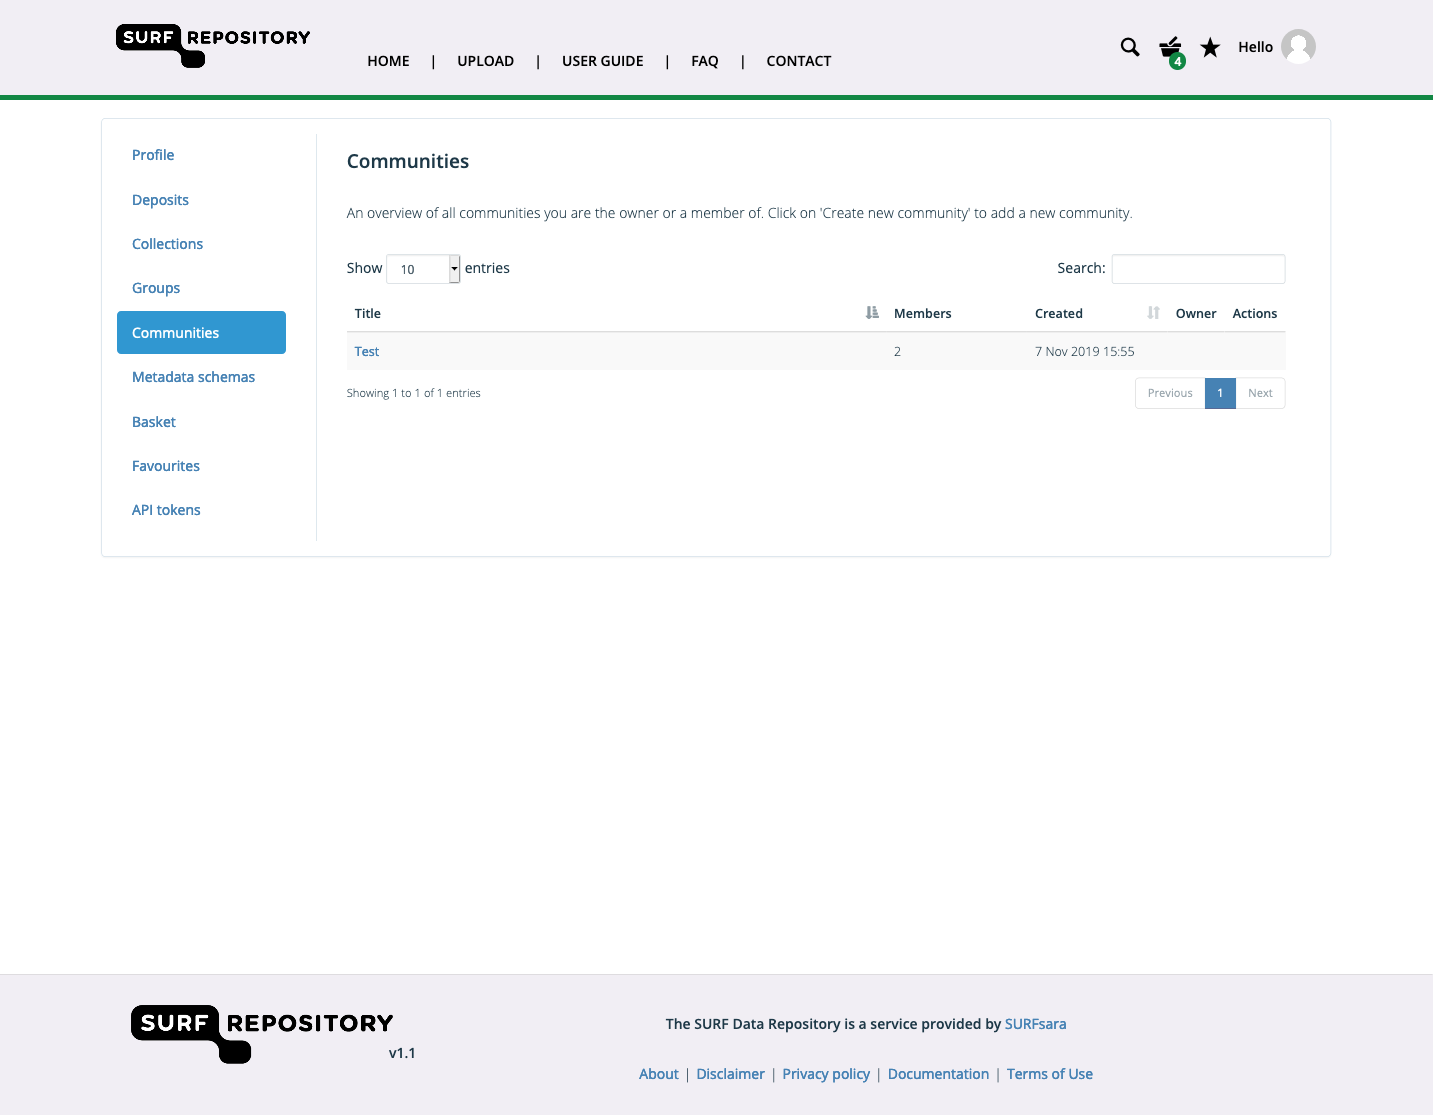
To create a new community or to see the list of current communities you own or are a member of, go to your account page and then choose the Communities tab on the left. Hit the Create new community to go to the community creation form.
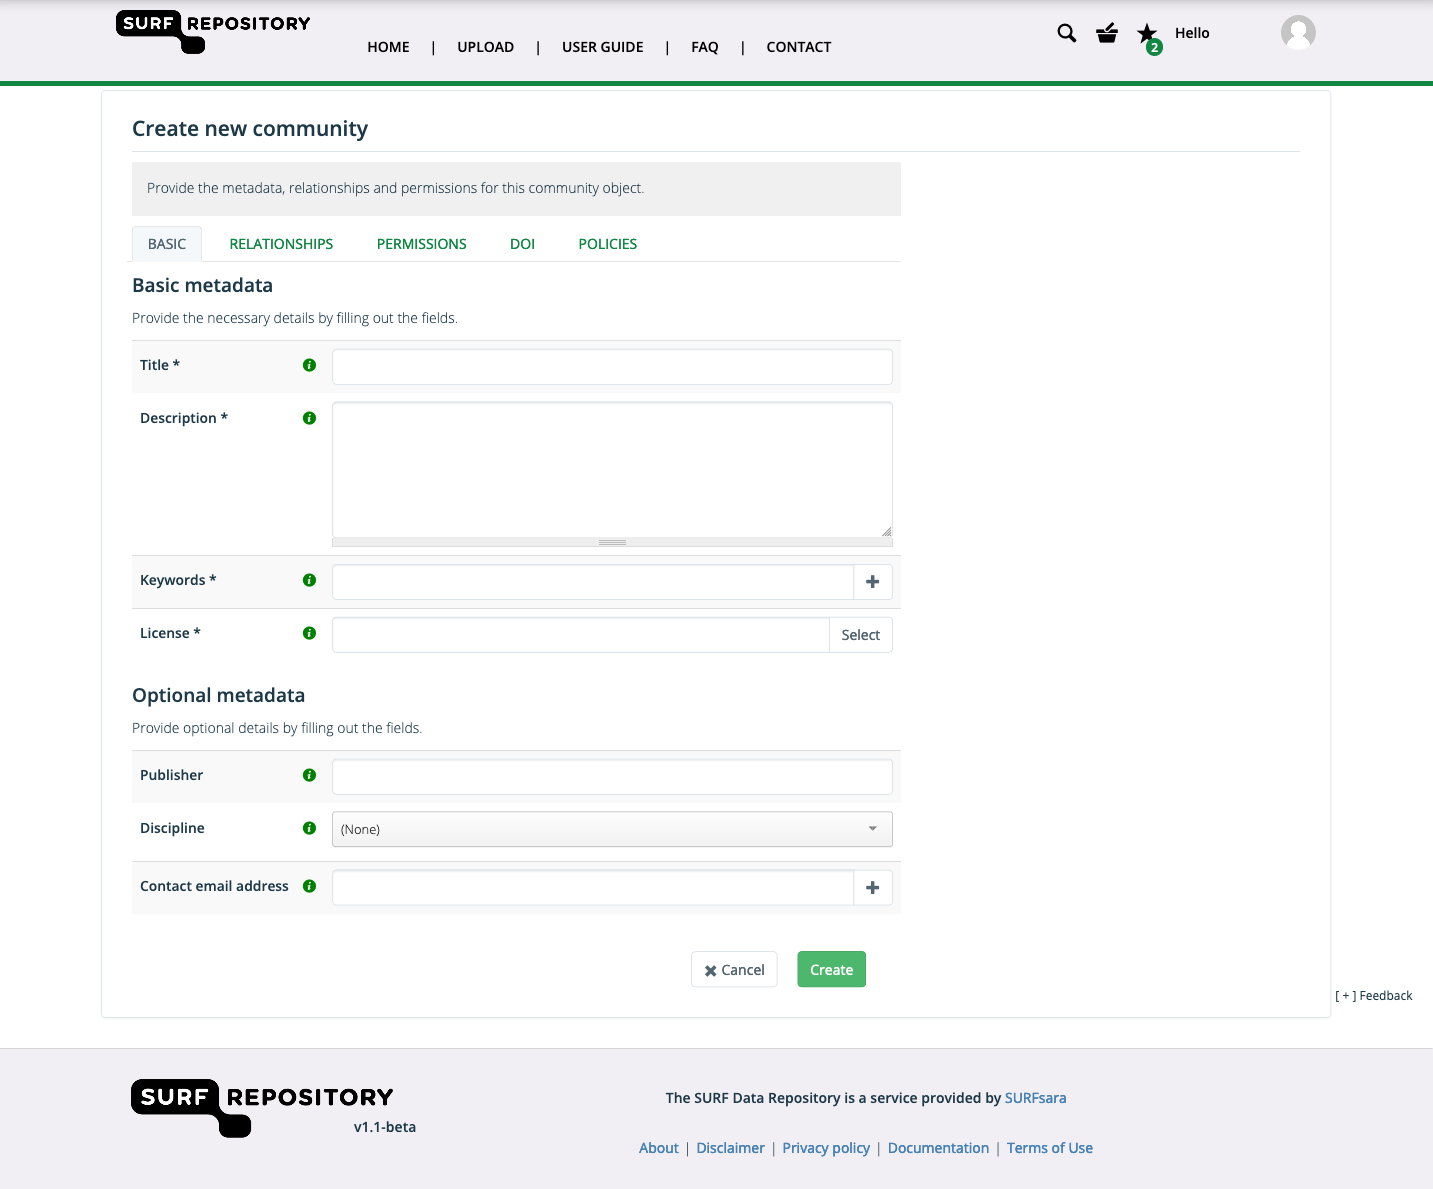
You can also create the community from the profile tab of your account overview page click on Create new community to go to the community creation form. A new page will be open where you need to provide more information about the new community you make such as the title, creator, and description:
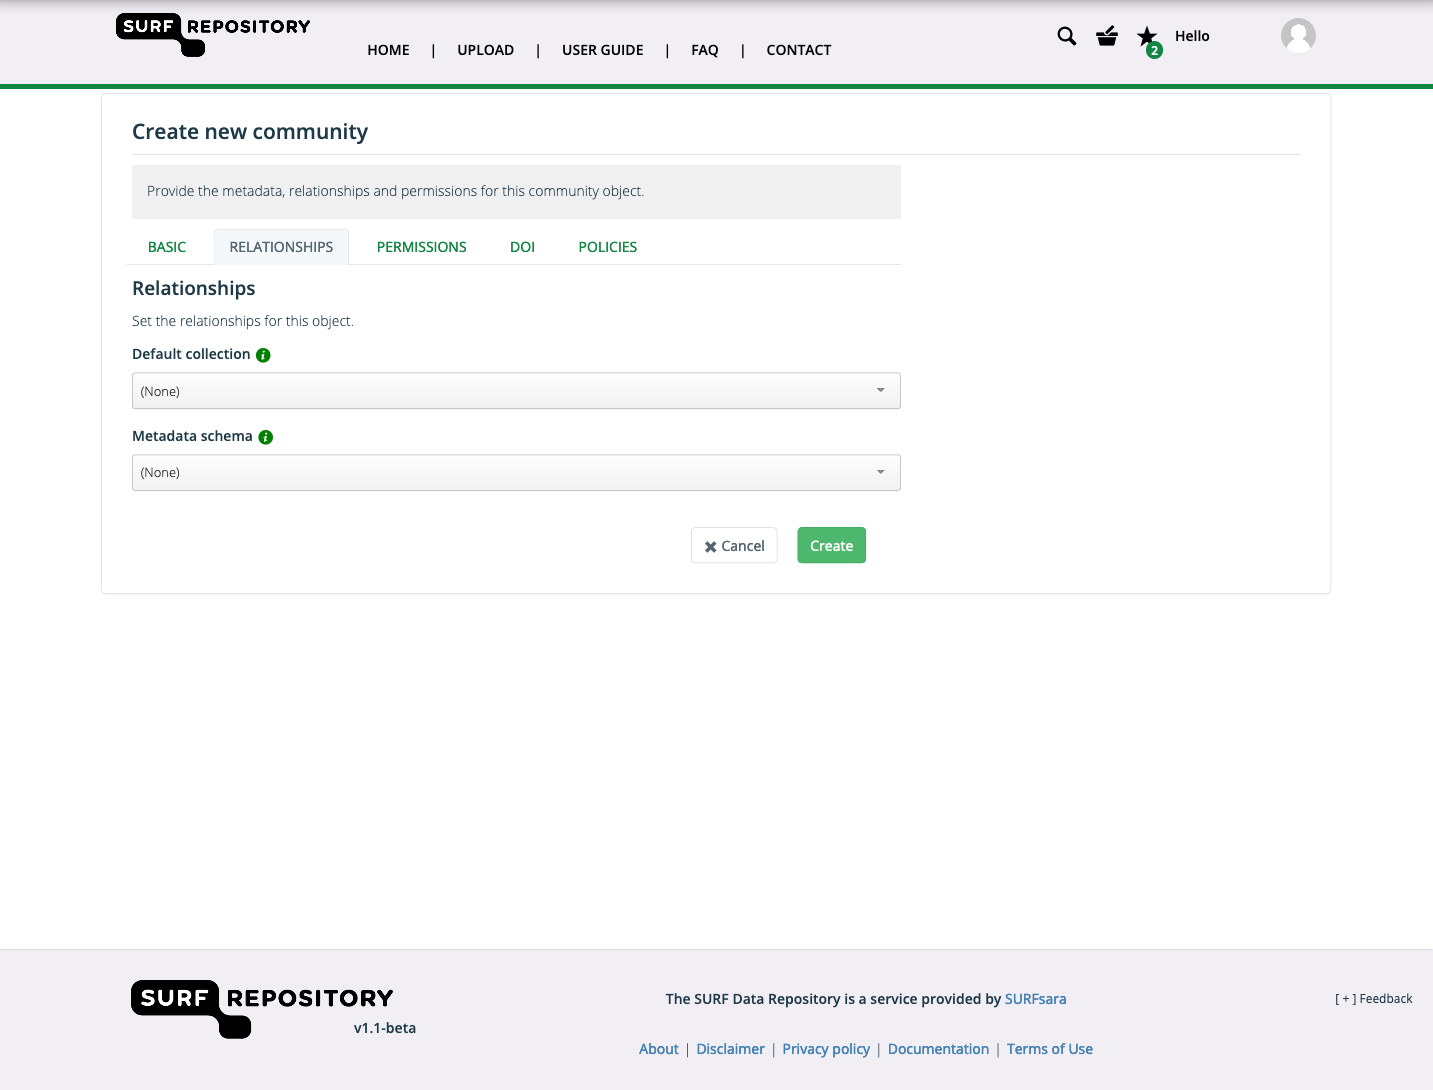
More information such as description, default collection and default metadata schema can be defined for the community on the ‘Relationships’ tab:
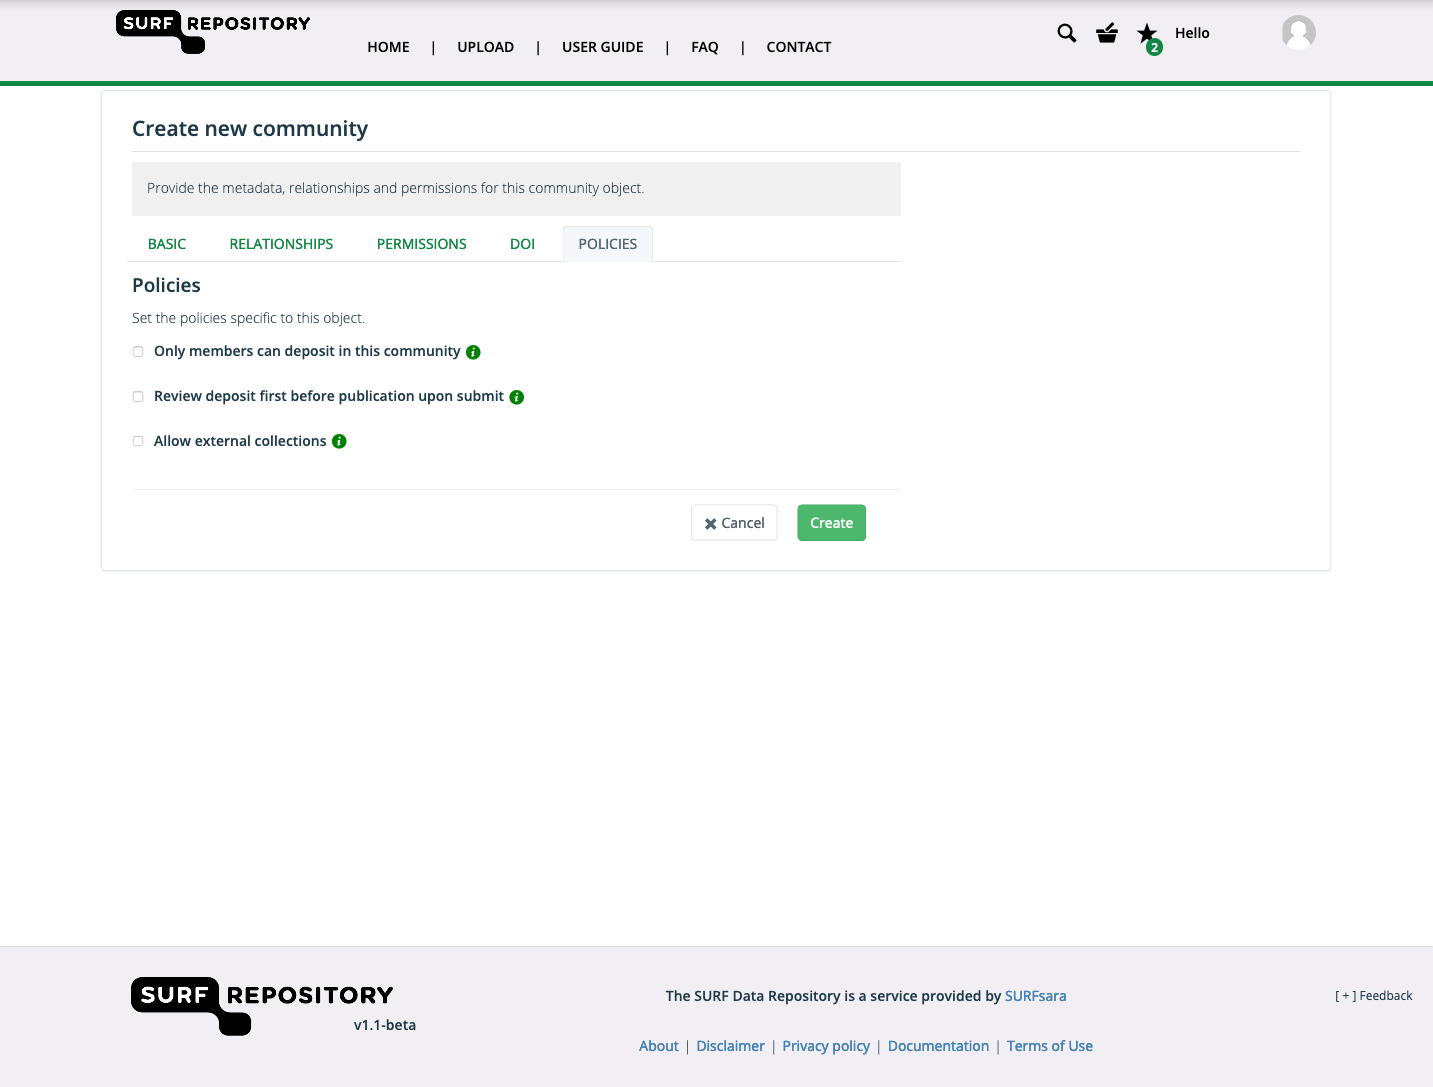
On the ‘Policies’ tab you can choose the policies you want to apply to the community.
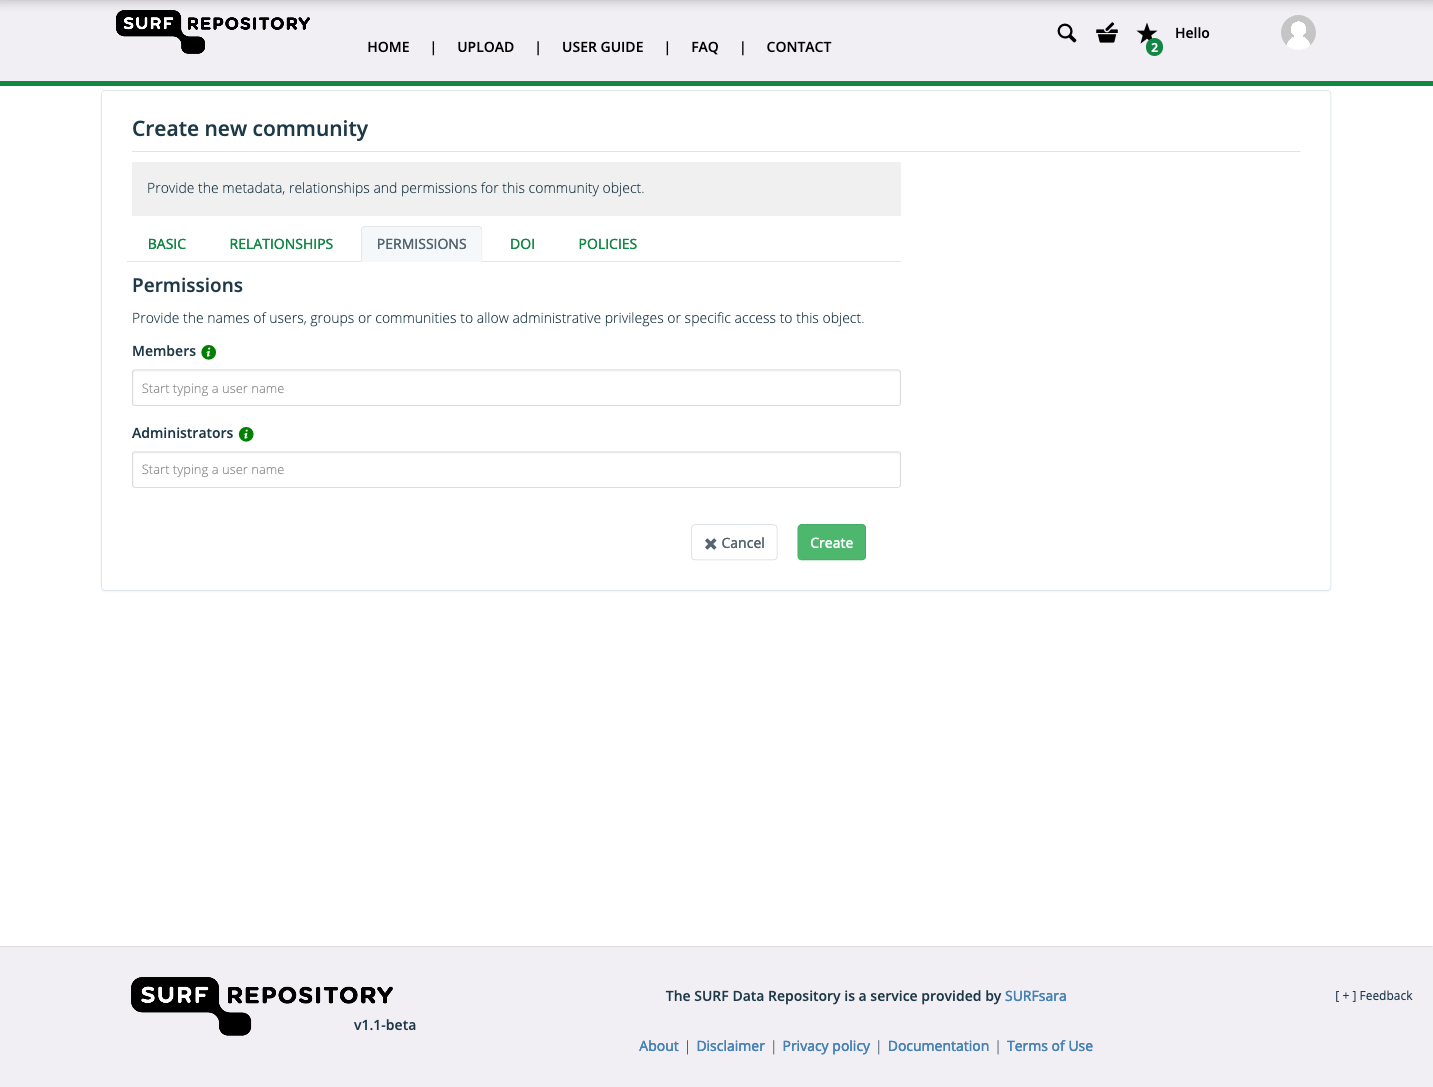
If you have a closed-member community, you should assign at least one member to the community on the ‘Permissions’ tab. Here you can also choose who can be the administrators of the community. If you are a community administrator, you have special privileges regarding the reviewing of objects, and editing their metadata:
After you enter the information, click Create to make the community.
Your community is now created and will be available during the workflow of new deposits. It is also visible in the community tab of your account overview page